Tuesday, February 24, 2009

TWD: Caramel Crunch Bars


It’s TWD again and it’s time for Caramel Crunch bars hosted by Whitney of What’s Left on the Table. These are from pages 112-113 from Dorie Greenspan's, "Baking From My Home to Yours"


I am pleased with myself this month because I participated in TWD every single week! Next month is 5 Tuesdays and as I enter my second session of Wilton, we will see what happens!

I decided to make these bars: one because I love a good shortbread, and two they just looked fun to pair them with ice cream. Fortunately to for me, these were rather easy. Easy enough to START baking these…Tuesday morning. Actually I was dealing with a whole other cake crisis so anyone requesting something from me can just take a number. LOL. (Whoa…testy—I think I need a piece of cake)

I altered the bars by adding toasted slivered almonds because I didn’t have heath, the closest store near my house didn’t have them and I wasn’t bearing the sub zero temps in the middle of a cake crisis to search further…as that would have sent this girl to the nut house!

I am not sure if it was just my bars, but they seemed not crunchy enough meaning they had the consistency that I didn’t cook them long enough? Not sure if anyone else had that problem or if that is the way they are supposed to be (I even cooked them a few extra minutes).

Regardless of my uncertainty of what they were supposed to be, I really enjoyed them. I love shortbread, probably because I am a big fan of butter. ;) . I thought the almond topping added great flavor and a nice crunch.

I made espresso ice cream the other day so I figured it would be a great accompaniment to the bars. So sinful, yet so good! One bite. That. Is. All. I’m. Allowed. Why? Because…these aren’t figure friendly! Sorry…this girl is on Vacation next week and I still need to fit into my spring-ish clothes.

Thank you Whitney for hosting this truly delectable treat this week!

Check out how the other bakers did by clicking on Tuesday with Dorie’s blogroll.

I’m off to frost this fix a cake disaster….ciao.

Sunday, February 22, 2009

Homemade Cinnamon Rolls in the Bread Maker

I really love cinnamon rolls. When I was in high school, my girl friend and I would go to the mall every weekend to spend our babysitting money on new clothes. Without fail I always made my way over to the Cinnabun store and ordered a large cinnamon roll with a side of extra frosting. It was my favorite treat.

So for as much as I love cinnamon rolls, I rarely make them (ok, almost never—I think I made them once). Truth be told, making my own dough just scares me. Mainly because of how labor intensive I think it is and about 75% of the time, it doesn’t turn out. Plus, who has patience to wait for something to rise? Not me.

For some reason last night I got up from the couch and decided I was going to make cinnamon rolls. (This type of neurosis is absolutely no surprise from my half sleeping husband). I have been wanting to make these for months and I figured I had everything at my fingertips; I might as well make a trial run and get some practice. It’s all about facing my fears these days.
I used my bread maker for my rolls but you can certainly do this without a bread maker. I have provided directions for both.

The verdict: These turned out great! Nice and gooey in the middle, spicy cinnamon flavor, and the frosting had a great cream cheese flavor. I was surprised to find that these were not that difficult! I even saved half of them in the freezer for another day! My father-in-law stopped by this morning to sample one and told me they were the best he ever had. I think he is a little biased.

Cinnamon Rolls
Recipe courtesy of Recipe Zaar

Ingredients
1 (1/4 ounce) package dry yeast
1 cup warm milk (I used low fat and that worked just fine)
1/2 cup granulated sugar
1/3 cup unsalted butter
1 teaspoon kosher salt
2 eggs
4 cups all purpose flour
1 teaspoon vanilla

FILLING
1 cup packed brown sugar
2 1/2 tablespoons Saigon cinnamon
1/3 cup unsalted butter, softened

ICING
8 tablespoons unsalted butter
1 1/2 cups confectioners’ sugar
1/4 cup cream cheese
1/2 teaspoon vanilla
1/8 teaspoon salt


Directions

1. Dissolve yeast in the warm milk. Pour into bread maker.

2. Add flour, sugar, eggs, butter, salt, and vanilla to the bread maker. (I added mine in that order you can check with your manufacturer’s instructions—mine didn’t provide any so I just made sure I put the liquid in the bottom since it had the yeast to make sure it was the farthest from the salt). As long as the machine is going to mix right away, it probably does not matter. Set machine on Dough.

3. If you don’t have a bread maker—just mix everything in a large bowl. Knead the dough into a ball with floured hands. Put it in a bowl and cover to let it rise in a warm place for about an hour (it should double in size)

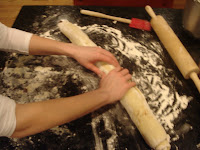
4. Pull risen dough out of bread maker or bowl and roll it out on a lightly floured surface to be about 21x16 and ¼ inch thick. (If your dough is really soupy—mine was….just add more flour and kneed it a few times until you have the consistency that allows you to roll it out.)


5. Make the filling by mixing together the butter, brown sugar, and cinnamon.

6. Spread filling on top of dough evenly.


7. Working from the long end, roll the dough.


8. Cut into 1 ¾ inch slices and place on a lightly greased baking pan.


9. At this point you can choose to cover with plastic and put in the refrigerator or freezer for later or you can bake them now.


10. Preheat oven to 400, you can put the rolls in the oven to let them rise a bit more while the oven preheats. If the rolls are coming from the refrigerator, you can put the baking dish from the refrigerator right to the preheating oven as well.


11. Bake 10 – 12 minutes. Mine took about 15 because mine came from the refrigerator. They should be somewhat golden brown on the top and gooey in the center.


12. Make frosting while they are in the oven, mix butter, sugar, cream cheese, and vanilla together with a mixer until smooth.


13. Pull rolls out of the oven and top with frosting.

Friday, February 20, 2009

Teddy Bear and Pansy Chocolate Butter Cupcakes

Continued Week #2 of Wilton classes!

Ok, so the directions for class were: frost a 8 inch cake or frost 8 cupcakes. Me, "the more is better when it comes to cake girl", made both.

Since I am on this 'try a new cake recipe kick', I tried a new chocolate cake recipe for this as well. The verdict: same as my white butter cake. Something was missing. Most specifically, cake that melts in my mouth. It just wasn't moist and chocolate-y enough for me. My go to cake, is still this one.

BUT, its not to say I can make some improvements on these in the future! I will say, my decorating skills are greatly improved!

We learned to make clowns, drop flowers (I think they look like pansy's) and bears. Oh my...these sweet bears were too cute! I was lazy and didnt want to change my frosting colors in my piping bag so white and pink got mixed and what came out were cute pink fuzzy looking bears. (Aren't most discoveries found by accident?). Too fun! Now, I just don't know what to do with all this cake!?

Chocolate Butter Cake
Recipe courtesy of: “Cake Love”, by Warren Brown

Ingredients:

7 oz. (1 ¼ cups) all purpose flour
2 oz. (1/2 cup) dutch processed cocoa powder, I used Droste
1 ½ teaspoons baking powder
1 teaspoon salt
1 cup half and half
2 tablespoons brandy
1 teaspoon vanilla extract
6 oz. unsalted butter
14 oz. (1 ¾ cup) extra fine granulated sugar
4 eggs

Directions:

Preheat oven to 350 degrees. Line two 8 or 9- inch round pans with waxed paper on the bottom. Or for cupcakes spray the pan with cooking spray then line 2 pans with cupcake liners. This recipe is really for two 9 inch pans, but if all you have are 8 inch, use those and make cupcakes with the extra batter. Just don’t over fill the pans!

Slowly cream the butter and sugar together until creamy and pale.

Sift flour, cocoa powder, baking powder, and salt together. Set Aside. These are your DRY ingredients.

Whisk together half and half, brandy, and vanilla extract together. Set aside. These are your WET ingredients.

Add eggs one at a time to the butter mixture letting them fully incorporate between each addition. Then alternate adding the dry and liquid ingredients into the butter mixture, starting and ending with the dry ingredients. Only mix until incorporated because you do not want to over mix the batter.

Pour batter into cake pans or cupcake liners. Fill only 3/4 full. For two, 8 or 9- inch pans, bake 25-30 minutes, for cupcakes bake 15-20 minutes. Cake is done when you insert a cake tester or toothpick and it comes out clean.


Purple Pansy White Vanilla Bean Cake with Strawberry Meringue Filling

For week #2 of my Wilton class, I wanted to try a new white cake recipe. I typically use the same one because it's so good, but I am really enjoying my "Cake Love" book these days and decided to give another one of Warren Brown's cakes a try, instead. This book is truly a phenomenal book for any new baker or someone learning to bake cakes or make frosting from scratch. The photos and flavor combos alone entice me and I look through this book more often than I would like to admit (I have read it cover to cover about 20 times).

My only issue is I think the cakes are a tad dry for my taste. I have, so far, tried 4 cakes all of which seemed to be lacking something. I think I am still going to try again, but alter each of them to see what happens. I am not sure if it's because I used cake flour for this white cake (which any book tells me that using it creates a light crumb) but anytime I have used cake flour the cake seems more dense and dry...not really 'light' at all. Also, what I have noticed in any cake I favor, is that they all contain one thing : Buttermilk. Something about the chemical interaction with the buttermilk and the other ingredients makes a very moist cake. So next time...I will have to try that...but for now...we are in trial stages! These are just my learning observations...

My favorite thing about this cake? The Strawberry Italian Meringue Filling. OMG. This frosting sends me through the roof. Let me tell you, this book has by far the most amazing frosting's I have EVER sunk my teeth into. If you get the Cake Love book for any reason, it would be worth it alone to get it for the frosting's. They are some what easy if you can master whipping up meringues. OK, enough plug for my fave book....of all time.

I will mention that since this cake was very 'structured', it cut rather well, and looked beautiful for its photo op. I topped it with a Vanilla Buttercream since that is easy to work with when trying to decorate. Thanks to my lovely neighbor "A" for taking pictures....she is pretty much the best neighbor on the planet. :)


White Butter Cake
Recipe derived from “Cake Love”, by Warren Brown

Ingredients:
12 oz. (2 ½ cups ) Cake Flour
3 oz. potato starch
1 ½ teaspoons baking powder
¾ teaspoon salt
¾ cup egg whites (about 4-5 whites)
¾ cup half and half
1 ½ teaspoons vanilla extract
1 ¾ sticks unsalted butter (7 ½ oz)
18 oz. (2 ¼ cups) extra fine granulated sugar
1 vanilla bean

Directions:
Preheat oven to 350 degrees. Line two 8 or 9- inch round pans with waxed paper on the bottom. Or for cupcakes spray the pan with cooking spray then line 2 pans with cupcake liners. I used two 8-inch pans and made a few cupcakes but this recipe is really for two 9 inch pans.

Slowly cream the butter and sugar until it’s creamy and pale.

Sift cake flour, potato starch, baking powder, and salt together. Set Aside. These are your DRY ingredients.

Whisk together egg whites, half and half and vanilla extract together. Set aside. These are your WET ingredients.

Slice vanilla bean length wise scraping out the seeds with the back of a knife.

Put the seeds of the vanilla bean in the butter mixture. Scrape down the sides of the bowl. Then alternate adding the dry and liquid ingredients into the butter mixture, starting and ending with the dry ingredients. Only mix until incorporated because you do not want to over mix the batter.
Pour batter into cake pans or cupcake liners. Fill only HALF full. Be sure to smooth out the tops of the batter because you will notice the ripples in the cooked cake if you don’t.

For two, 8 or 9- inch pans, bake 25-30 minutes, for cupcakes bake 15-20 minutes. Cake is done when you insert a cake tester or toothpick and it comes out clean.

Italian Meringue Buttercream
Recipe from “Cake Love” by Warren Brown

5 egg whites, room temperature
10 oz. (1 ¼ cup) fine granulated sugar, divided
¼ cup cold water
4 sticks unsalted butter, room temperature, broken into 1 tablespoon chunks

Directions:
1. In a heavy bottom saucepan, add 1 cup of the sugar (save the ¼ cup of sugar for the egg white mixture) and the cold water. Stir with your candy thermometer and set up the thermometer to sit inside the saucepan so you can keep an eye on the temperature. Heat on medium heat until it reaches 245 degrees. (Just above the ‘soft ball’ stage).
a. Tip: Place the lid half way on the pot to collect the condensation so the sugar crystals don’t build up. To prevent it further, use water and a pastry brush to brush down the sides of the saucepan.
2. While the sugar syrup is heating, begin mixing your egg whites on high until you get stiff peaks. Once you get stiff peaks, add the ¼ cup of sugar while the mixer is still running.
3. Check on your syrup. It should be about 245 degrees now, if not, turn up the heat and KEEP AN EYE ON IT. You don’t want it going too far or else you will get caramel.
4. Once the syrup reaches 245 degrees, remove the thermometer. Keep the mixer running and slowly pour the hot syrup into the mixer along the side of the bowl. Be careful not to splash yourself with the hot liquid.
5. Keep the mixer running on high for 2 minutes, and then turn it down to medium speed for another 5 minutes or so until the meringue is cooled.
6. Add the butter, one tablespoon at a time. Mix until it’s fully incorporated. Add your flavorings.

Fruit Flavoring
1 10 oz. bag of frozen fruit, keep the juices (cherry, raspberry, strawberry)
2 tablespoons superfine sugar
1 teaspoon freshly squeezed lemon juice
For Strawberry: (The Cake Bible) In a colander over a bowl, thaw strawberries. Press them to force out the rest of the juices. You will probably get about ½-3/4 cup. Take the juice and boil until reduced by 75% (about a ¼ cup). In a food processor, puree strawberries. This will give you about ½ cup. Stir together the puree, syrup and lemon juice. This should give you about ¾ cup. If you want it sweetened add the sugar and stir until dissolved. (The proper proportions is 1/5 of the mixture to be sugar so for ex: if you have 1 ¼

The Red Velvet Rainbow Cake

For week #1 of my Wilton class I decided on Red Velvet cake with Vanilla Buttercream. (I just couldnt frost this with the Wilton frosting...*GAG*) This was my first "go" at red velvet. I have had a few recipes just sitting in my recipe binder for probably a few years but just never got around to it.

My vow for my wilton class was to try recipes I have never used because after all...thats what this class was about, trying new things, and practice.

The Verdict: The red velvet cake was quite nice. It had a soft crumb and a light chocolate flavor. Caveat: Not chocolate enough for me, and mine didn't turn out with enough 'red'. (Although I can't say I am a huge fan of food dye in the first place).


The decorating process for this cake was a sinch! All you do is outline the rainbow with piping gell on a sheet of parchment and then rub it on the cake. And voila! you have an outline of a rainbow and all you have to do is pipe the little stars in between the lines. So easy....but clever!

Red Velvet Cake
Recipe derived from: Joy of Baking

Ingredients:
2 cups all purpose flour
1/2 teaspoon salt
2 tablespoons (15 grams) Dutch-processed cocoa powder
1/2 cup (113 grams) unsalted butter, at room temperature
1 1/2 cups (300 grams) granulated white sugar
2 large egg
1 teaspoon pure vanilla extract
1 cup (240 ml) buttermilk
2 tablespoons liquid red food coloring
1 teaspoon white distilled vinegar
1 teaspoon baking soda

Directions:
Preheat oven to 350 degrees. Place cupcake liners in cupcake pan. Cut up 24 pieces of aluminum foil and roll them into little balls about the size of a marble. Set aside.

Sift together, flour, cocoa powder, and salt. Set aside.

Mix buttermilk and food coloring together. Set aside.

In a large mixing bowl (or stand mixer), beat butter until creamy. Add sugar and beat on low speed for about 3 minutes. Add eggs, one at a time, allowing each to incorporate into the mixuture before adding the other. Scrape down the sides of the bowl. Add vanilla extract and mix until fully incorporated.

On low speed, alternate adding the flour mixture and buttermilk mixture starting and ending with the flour mixture.

Combine vinegar and baking soda. Let it fizz and then immediately fold it into the cake batter.
Pour the batter into the prepared cupcake pans with an ice cream scoop or 2/3 full. To create a heart shaped cupcake, put the aluminum foil balls or marble between the cupcake liner and the pan. You should see the shape of a heart. Bake for about 15-20 minutes. The cake is done when a cake tester is inserted into the middle and comes out clean. Cool completely before frosting.


Vanilla Buttercream
Recipe courtesy of Mirepoix Cooking School

Ingredients:
2 lb pure cane confectioners’ sugar 10x
1 12 oz. can of evaporated milk
1 lb. Sweetex shortening (found at cake supply stores)
1 lb. unsalted butter
1 tablespoon vanilla extract

Directions:
In a stand mixer fitted with the paddle attachment, combine sugar and evaporated milk. Mix on low to incorporate. Continue mixing for 15-20 minutes until fully incorporated. Then add butter and shortening 1-2 tablespoons at a time. Beat until fully incorporated.

Wilton Classes: The prospect of learning to decorate a cake

I have cake coming out of my ears this month! I have 7 cakes on my roster.
I think it’s no secret that I love cake/cupcakes. My problem is, while I was able to master flavor purely by trial and error, I had yet to master aesthetics.

For cupcakes, it was fairly easy. I could put my frosting in a piping bag and make them look fancy by making swirls. But when it came to my cakes, my decorating skills were much to be desired.

I decided the best way to pass time this winter was to sign up for the Wilton Cake Decorating classes. After only 3 classes, I am improving and in the meantime having a blast! Now if I could master keeping a steady hand…I may be in business…literally. *Fingers Crossed*

Here are some of my latest creations from class along with the recipes I’ve been trying. I will post them separately because otherwise…It’s too hard to categorize and navigate through the post.


Week #1: Rainbow Cake:
Cake: Red Velvet (My first go at Red Velvet!)
Frosting: Vanilla Buttercream


Week #2: Purple Pansy Cake
Cake: Vanilla Bean White Cake
Filling: Strawberry Italian Meringue Buttercream
Frosting: Vanilla Buttercream


Week #2: Pink Bear Cupcakes (Purple Pansy, and Clowns too)
Cake: Chocolate
Frosting: Vanilla Buttercream

Tuesday, February 17, 2009

TWD: Devil's Food White-Out Cake


It’s happened.

It’s happened!

It’s TWD and someone, specifically Stephanie of Confessions of a city eater, has finally chosen the cover cake. (Ok, I have only been baking with TWD for about 4 months but believe me….it’s been a long time coming for all the bakers). If you would like to take a look at the recipe, please visit Stephanie’s page.

One of the things that drew me into Dorie’s book the most was her celebration cake section. I am drawn to cake naturally so it’s really no surprise! But my goal is to try them all. So this week, I have one down…

I make chocolate cake frequently and one of the things I am leery on is using melted chocolate in a cake. For brownies, absolutely. For cake…I am on the fence. This one had both Dutch processed cocoa AND melted chocolate. For this cake, I think the combo worked. This cake seemed much more like a torte. It didn’t rise much and was difficult to slice the layers because they were already fairly thin.

The frosting was a billow-y marshmallow frosting. I love marshmallow fluff so I couldn’t wait to give this a try. I did alter it a bit and added a vanilla bean for an extra kick. I didn’t care for the bite of the cream of tarter so I added a few tablespoons of butter at the end of the mixing---word from the wise, Don’t. The frosting seized and became a watery mess. Oops! So the second trial, I just kept according to plan.

Assembling the cake was pretty easy and looked stunning. I thought the flavor of this cake improved the second day. The cake was more fudgy and dense, and the frosting and cake flavors had more time to get together and mesh. Over all, the cake was great, and rather impressive!

If you want to see how the other bakers fared this week, click on TWD’s blogroll.

Tuesday, February 10, 2009

TWD: Floating Islands

I hate tempering. No matter what, my eggs always scramble.

So when I saw this week’s TWD involved some kind of tempering and dealing with my ‘oh so not favorite thing’ (making meringues), I told another baker that floating islands ‘scared me’ and I wasn’t sure I was going to make them.

Then, I reminded myself of why I joined a baking club in the first place. To try new things, or at the very least conquer things I don’t normally set out to do in the kitchen. So, I put my big girl panties on and got out my eggs and started tempering. Otherwise, what’s the point?

For someone who aspires to be a pastry chef, I ought to be a bit more tough…and not let things I’m not so sure of “scare me”. I suppose I could use that advice for life in general.

Anyway….

This week’s TWD was hosted by Shari of Whisk a Food Blog. If you would like to see the recipe, be sure to visit her page. You can also check out what the other TWD bakers were up to this week by clicking here.

How did I fare this week?

Well, I think the saying is “It’s better to try and fail than to never try at all”???

That was me this week. Failure.

My eggs certainly did scramble because I couldn’t get the temp up to 180, and pressed on to try to reach it. It never happened. Instead, I got scrambled anglaise. I strained it and prayed it would be better in the morning. Nope. Still scrambled bits left and very thick. *shivers*

But I was determined to see what the fuss was about with poaching meringues. I had to try it. So I separated more eggs, whipped them, and poached them. It was cool to watch but honestly, either I’m not getting the nostalgia of a foamy egg white in my mouth or I did it all wrong. (I’m hoping it’s the latter because together my dessert was utterly repulsive). Between the slimy foamy consistency of the egg and the scramble in my anglaise….it just wasn’t a home run for me. So I am looking forward to today just to see what the other bakers’ came up with.

Back to the drawing board….

Monday, February 9, 2009

Saturday night "IN" with Lamb Burgers


I love a ‘good’ burger.


Good, juicy, need two napkins kind of burgers.


Yes, I am a total burger snob which means you will not see me pulling out of a McDonalds drive through anytime soon. I’m sorry, but I just can’t do it.


There are so many great burger joints by my house so I rarely make my own burgers at home. But when I saw Giada make these great lamb burgers on her show, I decided it was the perfect meal for my Saturday night ‘in’. I served them with homemade sweet potato fries and fresh buns from the market.
Lamb Burgers
Recipe derived from Giada Di Laurentiis

Ingredients:
1 pound ground lamb
¼ cup plain bread crumbs
1 egg beaten lightly
¼ cup flat leaf parsley, chopped
½ cup Parmigiano Reggiano
2 tablespoons whole milk
Top with: fontina cheese and basil leaf.

Optional: Wrap the burgers in prosciutto.

Directions:
In a large bowl, mix all the ingredients together. Form burger patties (this will probably make between 3-4, depending on the size). Brush buns with olive oil.

Heat heavy bottomed skillet, add olive oil. On the stove top, cook on each side for about 4 minutes a side. Meanwhile, toast buns in the oven. Top with cheese, then let the burgers sit for 5-10 minutes. Top with basil and buns and serve!

Busy Weekend Spicy Tomato Soup


Every weekend when it’s cold, I make soup. I’m not exactly sure why but I think it’s just because I love the smell of garlic and onion sautéing in the house! Plus, a soup’s flavor typically improves with time, meaning I can re-heat it later in the weekend to eat for a quick lunch or even dinner without that dreaded ‘left over’s’ taste.

This weekend got rather busy in my house because I signed up for a cake decorating class and I have about 5 cakes I have to make this month between TWD and my class (not to mention all the other goodies on my ‘to try’ list. And every time I turned around it seemed I need to start another meal which led to its clean up. So by Sunday afternoon, I decided its time for a short cut. Yes, even though I am no fan of pre-prepped goods, even I take ‘short cuts’.

I got this recipe of course from my idol in cooking, Giada, from the Food Network. Let me tell you, this spicy tomato soup is amazing, hearty, and deliciously spicy. I changed it up a bit and cut the recipe in half since it was just my husband and me.


Spicy Tomato Soup
Recipe derived from Giada Di Laurentiis

Ingredients:
3 tablespoons olive oil
1 carrots, peeled and chopped
1 Parsnip, peeled and chopped
½ cup Spanish onion, chopped
1 clove garlic, minced
1 (26-ounce) jar marinara sauce (San Marzano brand, if you can’t find it just use a GOOD quality marinara)
2 (14-ounce) cans chicken broth, homemade preferred
1 (15-ounce) can cannellini beans, drained and rinsed
1/2 teaspoon red pepper flakes
1/2 cup ditalini pasta (or any small pasta)
1/2 teaspoon salt
1/2 teaspoon freshly ground black pepper

Garnish: Basil, plain yogurt, homemade croutons


Directions:

Heat a large heavy bottomed (non reactive) pot, add the olive oil. Add onion, carrots and parsnips. Sauté until soft, about 8 minutes. Add garlic and sauté for about 30 seconds. Add the marinara, chicken broth, cannellini beans, red pepper flakes, pasta, salt and pepper. Simmer for about 15 minutes until pasta is soft. Serve with plain yogurt, basil and homemade croutons on top.

To make homemade croutons: Slice up day old bread into cubes, drizzle with olive oil, and put in a 350 degree oven until toasty. About 5-10 minutes.

Tuesday, February 3, 2009

TWD: World Peace Cookies

This week’s TWD is hosted by Jessica of Cookbook habit. If you would like to see the recipe for these great World Peace Cookies, be sure to wander over to her page to check it out! OR of course you can always purchase Dorie Greenspan’s book, Baking From My Home to Yours.

I have only been cooking with TWD since November but I have to say, this is without a doubt, my favorite recipe thus far. In fact, these are THE best cookies I have ever eaten (ditto for my hubs who tells me this as he stuffs 2 cookies in his mouth ). To think I even considered cutting the recipe in half.....I swear it was only a split second of insanity until I came to my senses. I'm much better now, I swear.
What I love best about these cookies is the sweet/salty taste. I used sea salt instead of the fleur de sel because it was $12.99 at my local gourmet grocery store and I just couldn’t stomach spending that on a small container of ‘salt’. I don’t think it affected the taste since I thought these were SO wonderful.
I can’t put my finger on what these cookies remind me of, but I’m thinking they are very much like a very chocolate-y brownie in flavor, but not really the cakey texture. These just melt in your mouth like a butter cookie….only these are LOADED with chocolate.
What is NOT to love about this cookie!?


I didn’t have any problems with the cookies crumbling while slicing like I saw on the Q&A but I did take one of the other bakers advice and froze mine first. I will say….these were an absolute BEAR to slice when frozen.... and I had a sharp knife!
Had I not been part of this group, I may have never considered making these. (I think I told you I am a total visual person, meaning I make things based on the pictures that accompany a recipe). Good thing the directions from the book are absolutely perfect, and I wouldn’t change a thing about these cookies. These will TOTALLY be part of my cookie repertoire for years to come. Thanks so much Dorie for sharing!