Monday, March 28, 2011

Vanilla Bean Angel Food Cupcakes with Chantilly Cream

My daughter had, yet another, birthday party this weekend.  This time, it was a joint party at a 'kid gym' for her and all her little friends that were born within the same month.  It was fun watching all the little ones play around on the mats and slides.  It's hard to believe I was a brand new mom this time last year.  I remembered sitting back at some point and thinking....how on earth did I get here???  I vividly remember playing outside at recess myself, and now, I am someone's mother?  This is crazy.

Anyway, to keep things simple, and somewhat less messy, and less sugary, I decided to make the kids vanilla bean angel food cupcakes with Chantilly cream.  The original recipe contained a yummy raspberry filling but since we would be at a place without high chairs or anything to contain our 'on the go' little ones, I omitted that.  These were light, spongy little cakes with just the right amount of sweetness from the cream.  I know my little G loved them as did many of the parents.  

Now I just need to figure out what to do with the leftover 10 egg yolks!

Vanilla Bean Angel Food Cupcakes
Recipe derived from Food and Wine

Cupcakes
Makes between 24-30 (depending on how you fill them)

1 cup cake flour
1/2 cup confectioners' sugar
10 large egg whites (1 1/4 cups), at room temperature
1/2 teaspoon salt
1 plump vanilla bean, split, seeds scraped
1 teaspoon cream of tartar
3/4 cup granulated sugar

Chantilly Cream Frosting

2 cups heavy cream
1/4 cup powdered sugar
1 teaspoon vanilla extract

Directions:
  1. Preheat the oven to 325°. Fill cupcake pans with paper liners.  In a small bowl, sift the cake flour with the confectioners' sugar. In a large bowl attached to stand mixer, combine the egg whites with the salt, vanilla seeds and cream of tartar and beat until soft peaks form. Add Vanilla, beat again.  Gradually beat in the granulated sugar, until the whites are firm and glossy. Fold in the flour mixture in two parts with a large rubber spatula just until combined.  You don't want to over beat or mix this with the mixer because you will deflate the egg whites.
  2. Spoon the batter into the muffin cups all the way to the top. Bake for 13 to 15 minutes, shifting the pan from front to back, until the cupcakes are springy and golden. Transfer the cupcakes to a rack to cool.
  3. In a stand mixer with the whisk attachment, beat cream on medium low until the cream starts to thicken.  Turn mixer up with high until soft peaks form.  Turn mixer down to stir and add powdered sugar and vanilla extract. Mix on high until you get between soft and firm peaks.  Put cream into a piping back with piping tip of your choice.  Pipe into cupcakes and top with a raspberry.


Wednesday, March 9, 2011

Floral Fondant Zucchini Carrot Cake


Tuesday was my last day of my Gum Paste and Fondant class with Wilton.  We had to do only one cake for the class --at the very end.  Thank goodness for that since my daughters birthday party nearly knocked me on my rear end.

I researched for a design from the first day of class.  But I hadn't quite decided on what to do until the Sunday before my last class.  I was initially so caught up in trying out a new cake flavor that I sort of put the design on the back burner.  I ended up going with something I knew would be good, in fear I would be left with some disappointing, dry cake.

For me, design always mattered in my cakes but flavor always took the front seat.  I think this is because I've had cakes time and time again at countless weddings, only to be left disappointed.  Lets face it, wedding cake tastes like crap.  Its always dry, the frosting tastes like a spoonful of gritty sugar, (reminiscent of a grocery store cake), and the designs most times remind me of something out of an 80's music video.  I don't get it.  It shouldn't be complicated.  Most times, simple is just better.  And if its good, who really cares?

But I care.  I care about it all.  I want it to look good, and I want it to taste good!

So after leafing through my Wilton instruction book I wasn't completely satisfied and turned to the net.  What did people do before Google?

I found this beautiful cake and while it didn't really provide much instruction at all on what to do, I knew that if I just got the right molds, I could plop myself in front of the Bachelor and just make it work.  A few hours of molding rose petal leaves, I was worried.  I couldn't quite see the big picture.  I wasn't sure how I was going to put these flowers together, and I wasn't sure if I should wait until they were completely dry (something I didn't really have a lot of time for as time was of the essence at this point).  I tried both methods, proving that these needed to be somewhat dry, and somewhat wet.

From the pictures you can't tell that it was my first time as a novice, but I am of course my worse critic and can see many of the mistakes and flaws.  Overall, I was very pleased with the outcome.  I loved the look, I loved the color, I loved it ALL!

After I added the black center, I was super excited to bring these to class, but also hoping I wasn't going to be in trouble for showing up with flowers that weren't shown to us in class.  HA!

My one problem?  Getting these darn flowers to stick...and stay stuck!  The flowers were so heavy it was a bit of an issue.  If anyone has suggestions....I'm certainly open for them.

I have to say, I came home with a big smile on my face.  I really felt I had accomplished something.  I feel like I've finally begun to figure some things out.  This is what I think I was meant to do.  It's taken 29 years.  I guess its better late than never.  Who knew cake could make you feel this good?


The cake was made with homemade marshmallow fondant.  I used this recipe.

The cake is a Zucchini Carrot Cake.


Zucchini Carrot Spice Cake

Recipe by:  Courtney Monigold
Ingredients:
  • 2 ½ cups all purpose flour
  • ¾ teaspoon baking powder
  • 1 teaspoon kosher salt
  • ½ teaspoon baking soda
  • 1 teaspoon cinnamon
  • ¼ teaspoon clove
  • ¼ teaspoon allspice
  • ½ teaspoon vanilla powder
  • 2 cups sugar
  • 2 teaspoons vanilla extract
  • 2 cups zucchini, shredded
  • 1 cup carrots, shredded
  • 1 cup canola oil
  • 4 eggs
Directions:
Preheat oven to 350 degrees.  Line 2, 8-inch round cake pans with parchment on the bottom and spray with pam and lightly dust with flour.  Put pans on a large baking sheet.  Set aside.
In large bowl #1: Combine flour, baking powder, kosher salt, baking soda, cinnamon, clove, allspice, vanilla powder, and sugar. Whisk together to combine.
In small bowl #2: Combine eggs, vanilla extract, and oil. Whisk to combine.
Pour wet ingredients into the dry ingredients. Just as the flour mixture is combined, add the zucchini and carrots. Mix only until combined. You do NOT want to over mix the batter.
Divide batter into 2 8-inch round pans.  Bake for 30-35 minutes and rotate the pans at the half way point (not before). Mine took about 30 minutes.  I usually start checking my cakes about 5 minutes before I think it will be done.  When the cake tester comes out clean, it's done.


The frosting is an Swiss Meringue Buttercream
from Martha Stewart.  I will mention as a side note, that SMB is extremely soft at room temp.  With that said, the filling sometimes can ooze out.  While this is the frosting of choice for me (its SO darn good), It can be extremely difficult to work with when fondant is concerned.  I refrigerated my frosted cake overnight before covering with fondant.  Generally, though refrigerating a cake can dry it out.  Thankfully, this cake, it was not an issue at all.  For the recipe, click here.


Saturday, March 5, 2011

Nursery Rhyme Birthday Party


I normally don't post specifically about events but since this was a pretty significant event in MY life, I decided it was just too big not to post about it.

I remember talking to my neighbor about the first birthday celebration when I was pregnant.  Our conversation is still so vivid in my mind.  She said, "Your life changes so much after having a child, you change, your marriage changes, everything changes.  The first birthday is a big deal because it's a celebration for BOTH of you.  It's a celebration that you BOTH made it through."  I probably would have never understood that before I had a baby.  But now I do.

It IS life changing.  This year has been full of changes.  But all fun, and good.  I love being a mom more than I ever thought possible.  And I really wanted to throw a party that celebrated all of these changes.  This certainly was one BIG celebration!

I decided I wanted to do nursery rhymes for a few reasons.  My daughter LOVES books and her room is actually decorated in vintage mother goose.  Finding things to go with a Mother Goose theme at the store? Forget it.

Luckily, I started several months in advance just scoping out ideas online and what invitations I wanted to use.  I made all the invitations myself tying in nursery rhyme sayings (buying the printed cardstock online).  I also purchased fabric online and had my seamstress sew a quick hem on them (I would have done this myself but being sick with bronchitis and a baby with croup for the weeks leading up the event prevented the time to do this!)


I made homemade banners by buying the program on Etsy. I just added the letters I wanted and printed on cream colored cardstock from Michael's.  I printed 3 large and 1 small banner and glued them onto ribbon I found at Costco with a glue gun


I found humpty dumpty balloons online along with a star for "Twinkle twinkle little star...".  I also found little nursery rhyme books in the fall at Target.  Each of these had little book mark tags (also found on Etsy) which were personalized with a little saying of "Thank you for attending my birthday party..."


I bought flowers from Costco, roses, for the "Roses are Red, Violets are Blue" rhyme.  I bought 4 tiny violet plants, too.  I cut the roses short and put them in green foam in small square vases, then wrapped them with ribbon.  The violet plants were also wrapped in ribbon.  I then wrote a little rhyme on cardstock that said "Roses are red, violets are blue.  Giuliana is one, and beautiful too."


I also bought bulb flowers in terra-cotta pots.  I painted them white and wrapped them in ribbon, too.  A card sat next to each plant that said, "Mary Mary quite contrary, how does your garden grow?"


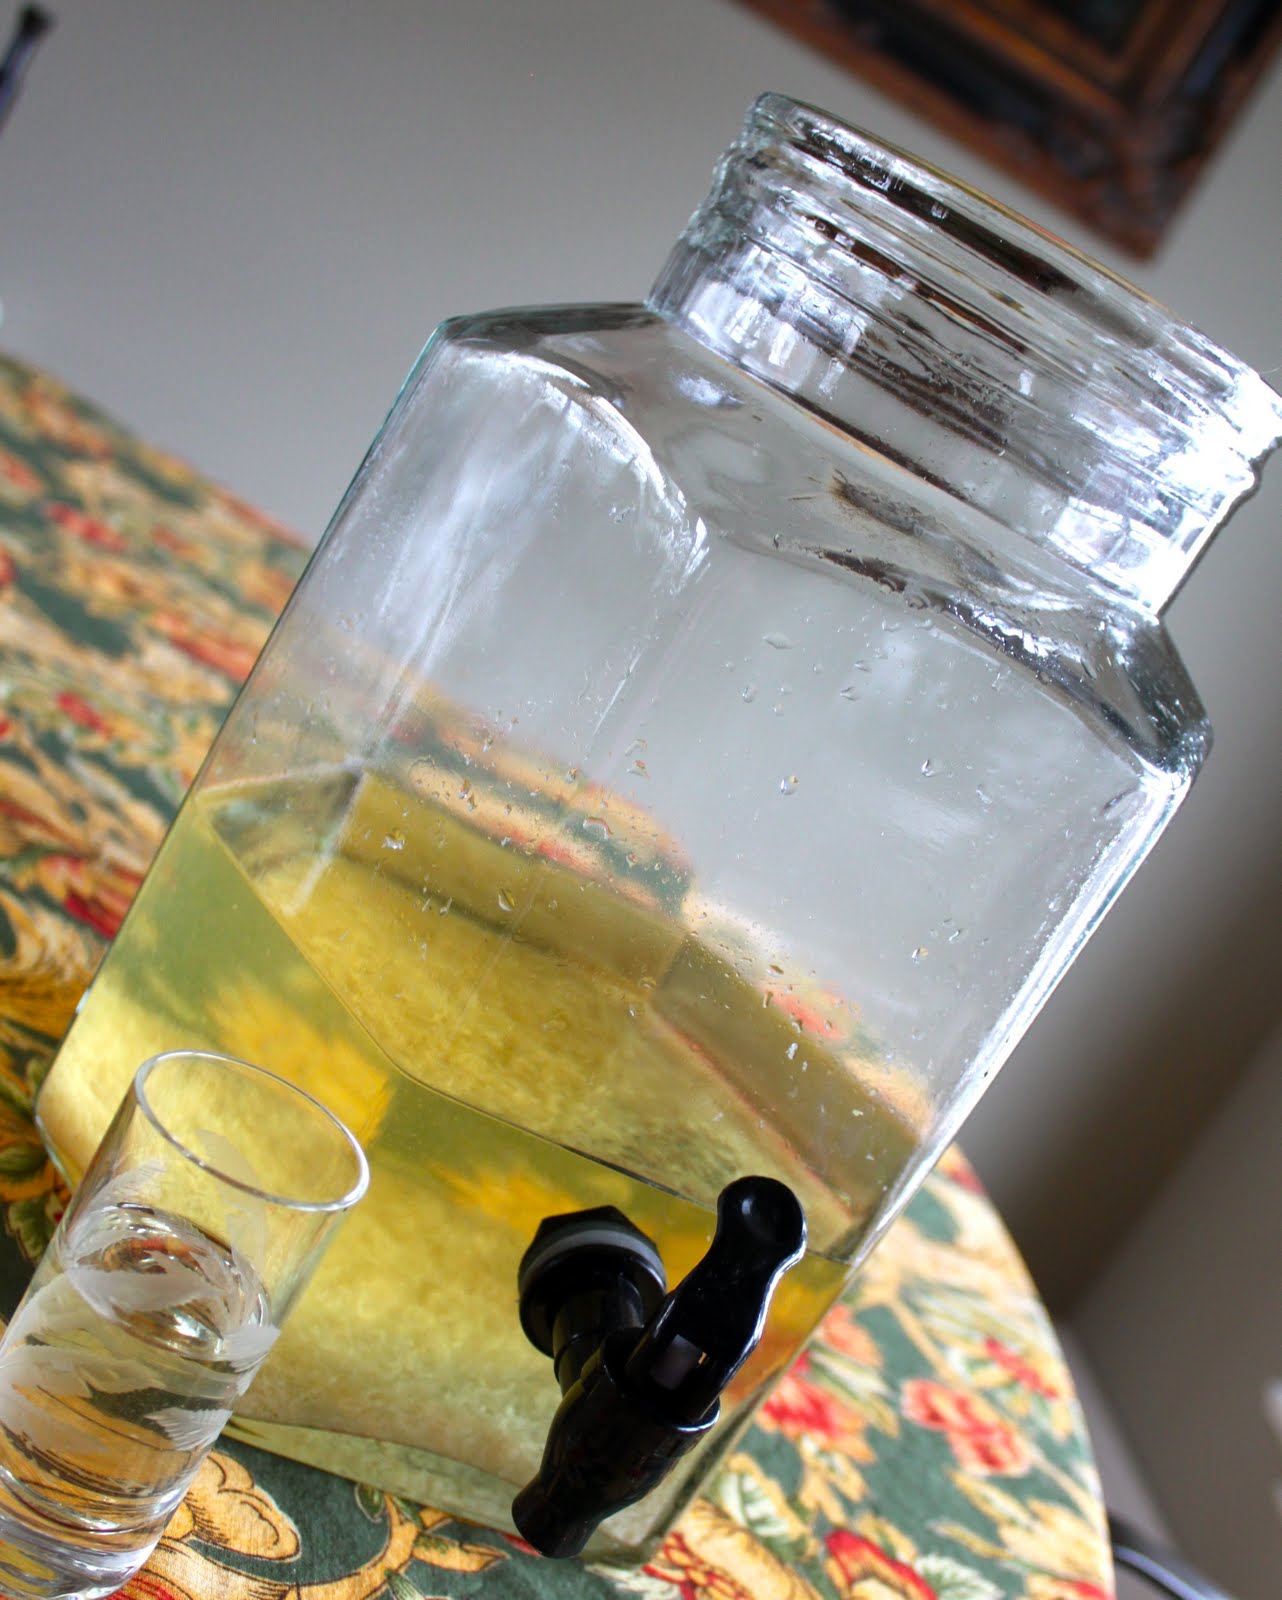
I also put little pint sized waters in a large silver pail wrapped in ribbon and a card that said "Jack and Jill went up the hill to fetch a pail of water".  The wine had, of course, another saying that incorporated wine.


Of course there were Three blind mice cheese and crackers and Mary Mary quite contrary garden veggie tray.


BUT.....
The real star of the show was naturally the dessert table.  Here is a list of a few things:


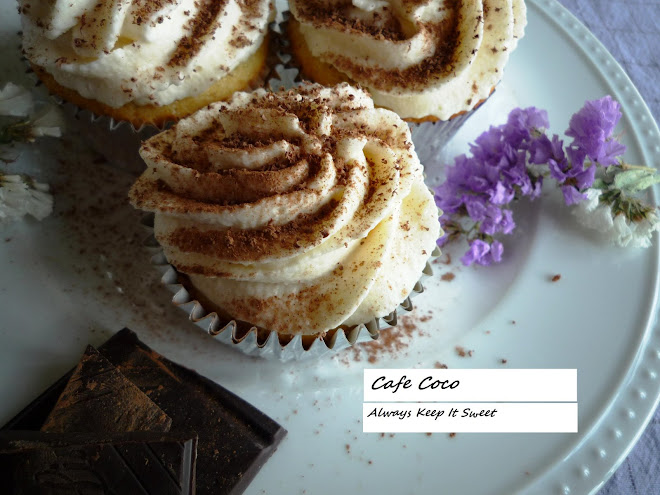
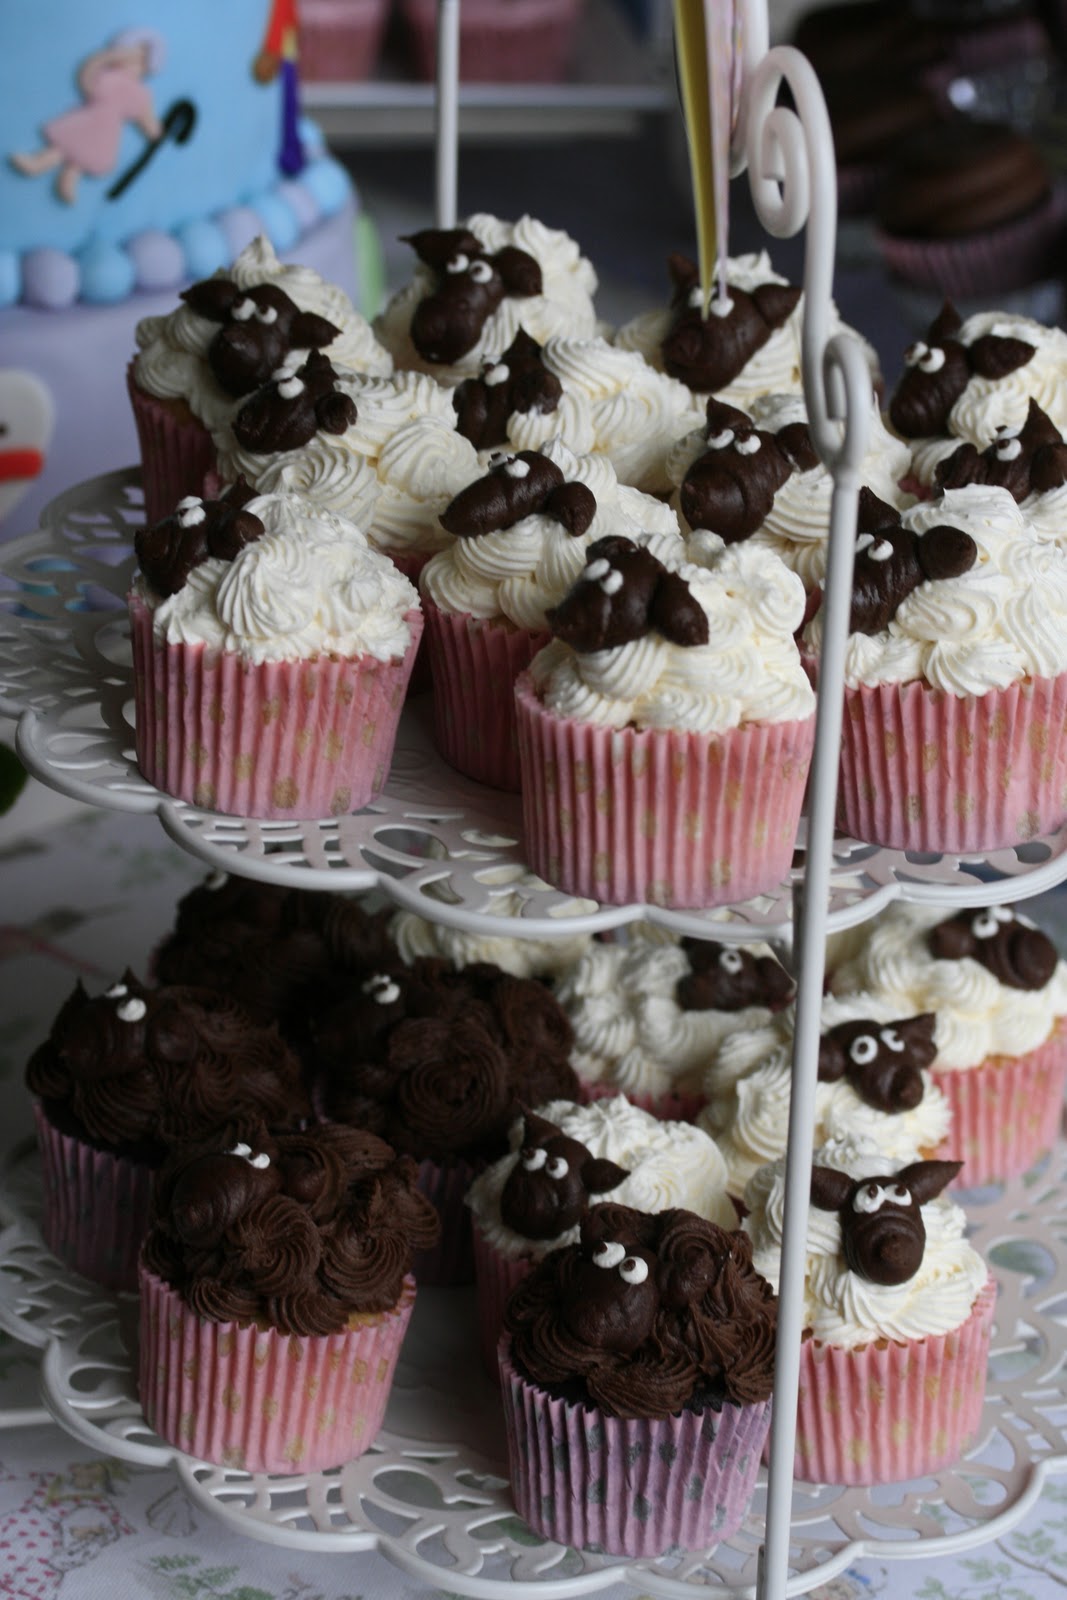
Little Bo Peep Lost her Sheep Cupcakes--vanilla bean cakes with vanilla Swiss meringue buttercream.


Ba Ba Black Sheep cupcakes -- chocolate cupcakes with chocolate ganache whipped frosting.


Peter Peter Pumpkin Eater pumpkin cupcakes-- pumpkin cupcakes with mascarpone whipped frosting.  For the recipe, click here.


This little piggy went to the market cupcakes-- strawberry cupcakes with raspberry swiss meringue buttercream.


That's what girls are made of, sugar and spice and everything nice cookies -- Egg nog snickerdoodles


And a random assortment of other goodies:
-Godiva inspired cupcakes:  Chocolate cupcakes with chocolate ganache whipped frosting, some with Italian meringue in both vanilla and raspberry.

-Confetti cupcakes with vanilla Swiss meringue buttercream

-Dorie's Chocolate chip cookies, for the recipe click here.

-Dorie's World peace cookies, for the recipe click here.

- Martha's peanut butter cups, for the recipe click here.

-Berry crunch bars, recipe from Magnolia bakery.

And FINALLY-the CAKE.  I signed up for a class at Michael's--the month of her party.  Unfortunately the class was delayed a few weeks in the month so I only had 2 intro classes on how to work with fondant and gum paste.  Luckily, it was just enough and between that and You Tube, I was able to successfully cover my cake in fondant.

The cake was a 2 layer cake, all revolving around a nursery rhyme.  I was flying by the seat of my pants while doing this and did rhymes I could think of at the top of my head.  I made my own fondant the week of the party (one batch) but it was white and I didn't want the hassle of dying it so I ended up buying everything from a local cake store.

The bottom layer was an 8-inch chocolate cake, filled with raspberry Italian meringue buttercream then frosted with Swiss meringue buttercream.

The top later was a 6 inch banana cake filled and frosted with Swiss meringue buttercream.  I actually went out to BUY a 6 inch cake pan but the two stores I went to did not carry them, so I ended up baking this in 2 8-inch pans and cutting it down an inch on each side (I saved the scraps in the freezer for a trifle)

I covered the bottom later in purple fondant, and the top in baby blue fondant.

Can you guess all the nursery rhymes on the cake?


Patty cake, "Patty cake baker's man".....pat it with a "G" for baby and me.  My daughter's name is Giuliana so instead of "B" for baby...it's G.  I also had a star for "Twinkle Twinkle", "Little bo peep lost her sheep", "Jack be nimble, Jack be quick", "Queen of Hearts", "Hey diddle diddle the cat and the fiddle, the cow jumped over the moon and the dish ran away with the spoon", "Humpty Dumpty", "Hickory Dickory Dock", "Mary Mary quite contrary.."


Most of the shapes were cut out free hand (much thanks to all the clay design classes I took in high school!) and cookie cutters (I have about 1,000) no-joke).  Never in my life did I think I would use the mouse cookie cutter...but I now have a new use.


I will post new recipes on a separate post so they are easy to find in the blog roll.

The party was SO much fun!  Overall I think I had 150 cupcakes!  I had little 'to go' cupcake boxes assembled so everyone could take some home as a party favor.  I mean...who doesn't like a cupcake??

You know what they say.... "A cupcake a day keeps the doctor away".

What?  They don't say that?  Huh...well they should!

Always keep it sweet.

Cafe Coco


Sunday, February 27, 2011

Throw a Party....Cafe Coco Style!


Just a little teaser post--


My sweet little baby turned one last week and we threw her a birthday party yesterday!  I was one BUSY mama busting my rear end baking to get this party together!

Here is a picture of the 'dessert' table in the middle of assembly.

More to come!

Hungry?

Thursday, February 17, 2011

Flourless Chocolate Torte with Raspberries and Cream


My husband isn't much for celebrating Valentine's Day.  I'm sure he probably thinks it's a stupid excuse for Hallmark to make a few extra bucks.  Truthfully, I love to celebrate EVERYTHING.


I celebrate life everyday, but a holiday that is based around love?  Count me in!  I wouldn't say I go overboard with crazy gifts and expectations, but it certainly gives me a chance to remind my husband how much I care about him and of course, make a special themed dinner.

I had all these great plans to do this elaborate dinner, invite friends over and eat chocolate all day long.  But--as nature would have it, my daughter came down with croup the week before.  I came down with bronchitis.  By the time Valentine's Day rolled around, I was dog tired from not sleeping and the last thing I wanted to do was cook an elaborate meal, and secondly, entertain anyone.  I talked myself into making this cake on Valentine's Day in the late afternoon.  My daughter was napping and I was starting to feel a bit better after my z-pack, so I figured, what the heck.

I have been eying this cake recipe from Williams Sonoma in my recipe binder for nearly 2 years (I know that is exceptionally long but I have A LOT of recipes on my wish list).  This was super easy to make!  It's very very chocolaty and it is very dense (due to the lack of flour).  You need quite a bit of chocolate for this recipe.  I used one of those really large chocolate bars from Trader Joe.

The verdict:  I really enjoyed this cake.  It was perfect for Valentine's Day!  I will say I cooked it for 10 extra minutes than the recipe said to, even though it said 'Don't over cook'.  Truth is, my oven typically cooks fast; but for whatever reason the center of this was pretty runny even when I finally pulled it out.  The cake is almost pudding/mousse like but more dense.  It was the perfect accompaniment to an indulgent night (watching The Bachelor while drinking a glass of wine).

Please excuse the 'nighttime' pictures as this wasn't ready to be sliced until late evening.  Man...I can't wait until summer!

For the recipe, click here.

Alterations:  I used instant espresso dissolved in water instead of the liquor.

Monday, February 7, 2011

New Discovery: Millet Polenta

While reading my December issue of Fine Cooking Magazine I was enticed by the grain article.  I'm always looking to try something new so when I read you could use millet grains instead of corn meal to make polenta....I decided it was worth a trip to the grocery store.

Now let me forewarn you, millet, isn't really something you may find at your corner store but I would imagine at most fancy grocery stores, you should be able to find it.  I found mine at our local fancy grocer, Plum Market.  I would imagine a place like Whole Foods would have it also, although I didn't look the last time I went.  It's relatively inexpensive, and its a good source of iron.  It's also easy to make!

The verdict:  Absolutely YUMMY!  The grain has a nice nutty flavor with a smooth, buttery but, grainy texture.  You can top it off with a bit of butter or a good quality olive oil (I always use Katz for finishing).  In this case, I am showing it with the olive oil.  I actually paired this with a pot roast I made in my slow cooker and the au jus from the beef was fabulous!  I would totally make this again and again!

I changed the recipe quite a bit, for simplicity sake from the original, but I would definitely try it next time with the vegetables.

For the original recipe, click here.

Here is how I prepared it:

Millet Polenta
Recipe adapted from Fine Cooking Magazine


Ingredients:
5 cups chicken stock, preferably homemade
3 tablespoons butter
1 cup millet
1 1/2 cups cheddar (I used a mix of leftover nubs of cheese in my cheese drawer- havarti, farm house cheddar, manchego)
sea salt to taste

Directions:
Rinse and drain millet.  In a large saucepan over medium heat, add the millet.  Toast for about 7 minutes, stirring frequently until fragrant.  Add butter and stir in until melted.  Add stock and bring to a boil.  COVER and simmer for 20 minutes.  Stir, recover for another 10 minutes.  Stir again and cover for another 5 minutes.  Stir in cheese and salt.  Serve.


Tuesday, February 1, 2011

Homemade Limoncello


The last time my husband and I went to Italy, we came home with a suitcase full of Italian souvenirs---including a few bottles of limoncello.

As nature would have it, I found out 10 days after returning home that I was pregnant. So my vision of sitting on my patio sipping on my limoncello was left at just that...a vision. I made my husband swear that he would not touch the last bottle of limoncello until after our baby was born so that I was able to enjoy those last sips and memories of our trip to Italy.

Once our daughter was born, the limoncello was fair game--and is now a distant memory.

We were able to hunt a bottle down at Dean and Deluca while in Napa for our 3 year anniversary and even though it was very good--it just didn't compare to what I found in Italy.

Most Italians make their own housemade limoncello. In fact, many of the mom and pop restaurants we went to served the best limoncello we ever had. So when I found a recipe for limoncello in my local newspaper...I was on it like white on rice!

Keep in mind- this is a sipping drink for after dinner. Pour a small amount into a shot glass and that should be all you need. The real purpose of the drink is to break down the food in your gut for easier digestion. Not sure if its true, per se but I will tell you it's worked for me when I've eaten a bit too much! ;)

The outcome: Totally lemon, totally delicious...and warning....totally strong!

Tip: Use my vegetable wash for the lemons!

For the recipe:

Homemade Limoncello
by: Cafe Coco

Ingredients:
1 liter GOOD quality vodka (preferably something with a higher alcohol content) I used Kettle One
2.5 cups sugar
2 cups water
Zest of 15 fresh lemons, washed

Directions:
Wash lemons well with a vegetable wash.  Pat dry.

In a clean gallon glass jar, add 1/2 liter (about 4 cups) vodka.  Zest lemons with a zester and add to vodka.  Stir and cover.  Let sit at room temperature for at least 10 days or up to 40 days (you want a cool, dark environment but not the refrigerator).

In a large saucepan, add water and sugar.  Heat over medium high heat until mixture becomes thick and sugar is disolved, about 5 minutes.  Take saucepan off heat and let sugar syrup cool.  Add syrup to the vodka, zest mixture and stir to combine.  Add the other half of the vodka (about 4 cups), stir.  Cover the glass jar again and let it rest for another 10-40 days.

Strain zest from vodka with cheesecloth and pour into clean glass containers.  Store in the freezer and serve as needed!