Saturday, May 30, 2009

Chocolate Chip Cookies with White Chocolate and Dried Cherries

I made these cookies for a friend of ours whose mother passed last week. I was trying to come up with something to say how very sorry I was about her loss….but the words just wouldn’t come together. I mean…are there really any words?

The truth is, I’m not really good with words. I cook…I bake and that’s how I communicate how I feel towards my family… ‘I love you’, ‘I care about you’…. ‘I’m proud of you’…and ‘I’m sorry’. Then I knew the only way I could show how much I cared, was to bake.

Then I started thinking of myself…and my relationship with my mother growing up. She didn’t bake much, but when she did, it was special. She made just the basic things, and chocolate chip cookies were one of them. Strangely, I didn’t like chocolate as a child (gasp—I know…crazy considering I would move mountains just to have it) but she would always be sure to make a few of the chocolate chip cookies without the chocolate…just for me.

So when I think of ultimate comfort and memories with my own mother, I think of those really cherished moments I spent watching her bake….and the special cookies she would make just for me.

I sought out one of Dorie’s recipes, because I was sure it would be a hit. (PLUS- I'm in TWD and that book is ALWAYS on my counter! What would you expect???)
I even added my BEST ingredients: my cherished fleur de sel, good gourmet chocolate chips, white chocolate chips, dried cherries, powdered vanilla, and an extra splash of my homemade vanilla extract.
The end result? Amazing cookies. Hands down, one of my favorite chocolate chip cookies. Soft, chewy, and full of flavor. The Fleur de Sel makes them I think...but the rest of the ingredients aren't too shabby!!

So bake away….it shows you care ;)

“My Best Chocolate Chip Cookies”
Recipe derived from: “Baking From My Home to Yours” by Dorie Greenspan

Ingredients:
2 1/8 cups all purpose flour
1 ¼ teaspoon fleur de sel sea salt
¾ teaspoon baking soda
1 teaspoon vanilla powder
2 sticks unsalted butter, at room temperature
1 cup sugar
2/3 cup light brown sugar, packed
1 tablespoon vanilla extract
2 eggs
12 ounces semi-sweet chocolate chips
¾ cup white chocolate chips
½ cup dried cherries, chopped


Directions:
Preheat oven to 375 degrees, line two baking sheets with silicone mats (use parchment if you don’t have silicone mats).

In a large bowl, whisk together the flour, salt, baking soda and vanilla powder. Set aside.

In a stand mixer with the paddle attachment (or hand mixer), beat butter until creamy. Add both sugars and beat on medium speed for about 3 minutes until fluffy. Add vanilla then eggs one at a time letting them fully incorporate after each addition. Put the mixer on low and gradually add the flour mixture just until it’s mixed in. Fold in the chocolate chips, white chocolate chips and dried cherries with a rubber spatula.


Using a cookie spoon or rounded tablespoon to form dough into little balls then place onto the cookie sheet. Space them about 2 inches apart. Bake about 10-12 minutes. Let the cookies cool down for about a minute then remove with a spatula and cool on a cooling rack. Be sure to cool the baking sheets in between batches!


For best results: Refrigerate the dough for an hour before baking. They seem to spread less.
Friday, May 29, 2009

A Return From Italy and a Roasted Red Pepper Polenta

Now that I have returned from my whirlwind tour of Italy, I think it’s now my duty to share some great Italian recipes with you!

First and foremost on my ‘to do’ list is to learn how to make handmade pasta. I have had this on my list for MONTHS and still have yet to just buckle down in the kitchen one day and get to it. For now, you will have to settle for my newest favorite dish, polenta.

I didn’t grow up on polenta. In fact, I never even knew what it was up until a few years ago. I thought it looked so good when I saw cooks make it on the food network so I tried it. I didn’t like it.

But eventually, after trying it at a fabulous restaurant near my house, I began to really love it. I think my problem was using plain corn meal. Nothing against plain ol’ cornmeal (It makes a mean corn bread) but it’s just not my choice for polenta. I can’t figure out why…they really are basically the same thing!

Regardless, after purchasing a bag that said ‘polenta’ grain on it, I instantly fell in love with this ancient Italian peasant dish.

So here you are—straight from Northern Italy…


P.S. I'll try to post more pictures of Italy soon.

Isola Bella, Lake Maggiore Italy


Roasted Red Pepper Polenta
Serves: 2 as a side dish

½ cup polenta grain
1 cup low fat milk
1 cup half and half
2 tablespoons unsalted butter
¾ cup fontina cheese or gruyere, shredded and divided
¼ cup roasted red peppers, diced
2 tablespoons pine nuts, toasted
½ teaspoon fleur de sel or any fine sea salt
Olive oil

Directions:
Bring milk and half and half to a simmer. Add Fleur de sel. Then add polenta in a steady stream while whisking. Cover and cook on low stirring the mixture frequently for about 6-10 minutes (depending on which grains you buy—mine cook in this time frame). Remove from the heat and stir in the butter, and cheese (reserve a bit for garnish). Then stir in the roasted red peppers. Top with toasted pine nuts, cheese and a drizzle of olive oil.

Friday, May 15, 2009

Cafe Coco in Italy


I will be out of the blogosphere for a few days while my husband and I go on a whirlwind tour of Italy enjoying Milan, and the Northern Italian Lakes (A.k.a. Lake Como, Lake Maggiore, Switzerland). I can't wait to share my travels and food pictures with all of you once I return!
Ciao Bella ;)


Tuesday, May 12, 2009

TWD: Tartest Lemon Tart 3 ways

I loved butter as a child. No matter how many times I got into trouble, every time I was out of my mother’s site, I would crawl up onto the kitchen table and eat the butter. By itself.


Not much has changed, I still love butter. (Although, I don’t sit on my kitchen table eating it by itself anymore that would be just plain weird.) I love the smell of butter and sugar mixing together, which is why I love this tart shell. It's buttery and it’s so easy for pastry dough, that it just doesn’t seem right. I left out the almonds…I don’t like almonds messing with my tart dough. It's a texture thing. Just my humble opinion.

Tart dough...I'm somewhat rustic when it comes to tart dough

Lemon dessert isn’t something I discovered I enjoyed until a year ago. I thought the only dessert out there was chocolate…and from the looks of TWD lately...you would think that chocolate WAS THE only dessert on this earth ;).

I didn’t use Meyer lemons like some of the other bakers. I would have loved to use Meyer lemons, but you see I’m leaving for Italy on Friday….and I am trying to use up whatever food stock I have before I leave.

I left the piff of the lemons off, as I received insider tips that it made this tart too bitter. I was sure to save all the zest…I mean….who would waste perfectly good zest? I tasted the batter….it tasted like delicious, sweet lemonade.

I made mini tarts….I figured it would make these easy to pawn off on my neighbors…who love lemon desserts. But since there were 4 tarts…I decided…why not make them different. So I added raspberries to one, blueberries another and two plain lemon tarts. I still had leftover lemon filling so I saved it and froze it for another occasion. I can’t wait for that lemon occasion.

My only problem was extracting the tarts from their pan….it’s possible I should have tried it while it was warm but I feared it would crumble in a million pieces. I think they may be permanently fixated in the pan…


I topped mine with powdered sugar for the photo op…but I plan on topping with whipped cream or crème fraiche when I serve this tonight after dinner. That is…if they make it that long.

Overall, this tart was very lemon-y (um...its called TARTEST Lemon tart for a reason)! If you like tart lemonade…you would love this. The texture is probably what I liked the most, really gooey caramel-y texture with the tart undertones (or really overtones in this instance) makes the dessert and I enjoyed it.

Thank you, Babette of Babette Feasts for hosting this lovely dessert this week. If you would like the recipe, be sure to check out Babette’s page or buy the book “Baking from My Home to Yours” by Dorie Greenspan. Be sure to check out the other bakers who diligently work each week with TWD!

I will be leaving Friday for Italy and out of the blogging world until after the Memorial Holiday….can’t wait to share our adventures with you! Don’t worry though; you can still check in on the other TWD bakers while I am gone!

Saturday, May 9, 2009

Espresso Chocolate Cake with Raspberry Mousse and Italian Meringue Buttercream

It’s seems that every time I turn around…there is another birthday in the family. And since I am the cupcake/cake queen I typically take on the task of baking the birthday boy or girl their cake of choice.

Yesterday was my husband’s Aunt’s birthday a.k.a. “Fancy Nancy”, so I wanted to make a very special cake since she always does so much for me. What is more indulgent than chocolate and raspberry?


I went out on a limb and decided to use a different chocolate cake than my “go to” recipe. Don’t ask me why, but I always feel like I need to re-create the wheel. I think I just need to realize if it’s not broke, don’t fix it. Not that this recipe was bad by any stretch; it wasn’t. But it just wasn’t what I expected, make sense?

I filled the cake with a raspberry mousse, and then slathered the cake with my “oh so favorite”, chocolate Italian meringue buttercream. The cake was delicious….especially at 11:30 PM after listening to Joe Cocker live across the Canadian border. Don’t laugh…it was an awesome concert!


Happy Birthday, Nance! Love, Coco xo


Chocolate Espresso Cake
Recipe derived from Bon Appetit, April 2009

Ingredients:
2 cups cake flour
1 cup packed cocoa powder (such as Valrhona)
1 ½ teaspoons baking soda
¾ teaspoons kosher salt
¾ cups unsalted butter, room temperature
2 cups light brown sugar
3 eggs
1 tablespoon vanilla extract
1 cup buttermilk
4 teaspoons instant espresso powder dissolved in ¾ cups hot water

Directions:
Preheat oven to 325°F. Spray two 8-inch cake pans with Pam and dust with flour or cocoa powder. Tap out the excess. Line the bottom of cake pans with parchment paper.

Sift the flour, cocoa, baking soda and salt together. Set aside. In a large mixing bowl, beat butter until smooth, add brown sugar and beat until creamy, about 4 minutes on low/medium. Add eggs 1 at a time and beat well after each addition and scraping down the sides of the bowl when needed. Add vanilla and mix. Add espresso mixture and mix together. Then on LOW alternatively add the flour mixture and the buttermilk starting and ending with the flour mixture. Mix only until just combined.

Split batter into 2 cake pans and place on a larger baking sheet. Put on middle rack in the oven and bake for about 40-45 minutes or until a cake tester comes out clean. Cook cakes on cooling racks until completely cooled. Using a serrated knife, gently run it around the edges of the cake pan so that it loosens the cakes. Invert cakes onto wax or parchment paper, then invert cake again so its top side up. Level cakes, assemble and frost once fully cooled.


Raspberry Mousse

Ingredients:
1 ¼ cup frozen raspberries (I used frozen black raspberries)
¼ cup granulated sugar
1 tablespoon lemon juice, freshly squeezed
1 ½ teaspoons gelatin
1 cup heavy cream
1 ½ tablespoons confectioners’ sugar

Directions:
In a small heavy bottomed sauce pot, add frozen berries and granulated sugar. Cook on medium/low until soft and liquefied. About 5-8 minutes. Put berries through a fine mesh sieve and push through with a rubber spatula. Make sure you get all the puree by running the spatula along the outside of the sieve. Do this until all the berry pulp is out. (You do this to keep the most seeds from being in the mousse.)


Pushing Raspberry Puree through the sieve

Return puree to the saucepan and put back on the heat. Add lemon juice and gelatin. Stir to combine. Cook until the gelatin is completely dissolved stirring constantly. Remove from heat and cool completely.

In a medium sized bowl, whip cream to soft peaks. Add confectioners’ sugar and beat until you get firm peaks.

Put puree in a medium sized mixing bowl, add whipped cream in 3 additions, slowly folding the ingredients together with a rubber spatula. Cover and chill until ready for use or serving.


Folding Puree in Whipped Cream

Serving tip: You can fill 1 two layer cake with this. Or you can pipe into fancy glasses and serve with fresh fruit.


Filling the cake


Friday, May 8, 2009

Split Pea and Ham Soup


This post so delayed it’s nearly embarrassing. I cook and bake pretty much daily but…somehow…some of my recipes/photos fall into the abyss somewhere! Like this one.

After Easter its tradition to make split pea and ham soup …to use up leftovers (really it’s just to appease myself that I will use up the leftovers). Instead of going with just the plain old green split peas…I went off the beaten path a bit and added some yellow ones just for fun. I think it enhanced the flavor a bit. You can certainly add ½ cup of onion to this, I just have an onion allergic husband so I pretty much have to omit them in anything I do. Bummer isn’t it?

This is a great soup, and I don’t think you have to wait for Easter just to make it. Most grocery stores and meat markets will give you a ham bone if you ask (you just may have to pay for it). The longer you cook it, the mushier the peas get…which we love. Be careful and go EASY on the salt. Flavor the vegetables lightly but after that….don’t add any until the soup is cooked. Why? Because ham and the ham bone contain so much salt already that if you aren’t careful you will have a soup so high in sodium no one would want to eat it. So take it easy…your heart will eventually thank you.

Enjoy!

Split Pea Soup

Ingredients:
1 ham bone
1-2 cups ham
3 cups chicken stock (preferably homemade)
6 cups water
2 carrots, diced
2 celery ribs, diced
1 clove garlic, minced
8 oz. dry yellow split peas
8 oz. dry green split peas
Salt/Pepper
Olive oil
Crème Fraiche

Directions:
Sauté carrots and celery in large soup pot with a 3-4 tablespoons of olive oil, salt and pepper lightly and cook for about 10 minutes or until vegetables are tender. Add garlic, and sauté for an additional minute. Add chicken stock, ham bone, and peas and cover and simmer on low for about 3 hours or until the peas are mushy. (Reserve ham).

Add ham and cook for about 5 minutes until ham is warm. Serve in bowls with a dollop of crème fraiche if desired.

Tuesday, May 5, 2009

TWD: Tiramisu Cupcakes

This week’s Tuesday with Dorie was hosted by Megan of My Baking Adventures. If you would like the recipe for this week’s TWD, be sure to stop by her page OR buy the book, "Baking From My Home to Yours", by Dorie Greenspan.

I will start by saying Tiramisu is not my favorite dessert. (I feel like I say that a lot which makes no sense because I consider myself a dessert fanatic). So knowing this ahead of time and having an entire cake in my house I knew it would be too much. After reading the Q&A, someone mentioned cupcakes, and that got me thinking. “I could make this into a cupcake!”

I was pleasantly surprised at how easy this cake (cupcakes in my case) were! The recipe had a lot of components but each one was rather simple and NOT time consuming at all. I was able to finish everything in a matter of hours, including assembly.


The cake flavor reminded me of my favorite, dare I say….boxed yellow cake **ducking from the vegetables and fruit being thrown at me as I speak**. My point is, the batter was very tasty, but once cooked they came out sort of dry. I’m not sure if I over mixed (which I’m pretty sure I didn’t) or over cooked (which I really don’t think I did but…). I just felt that the cake turned out to be a tad stiff and not flavorful at all. I’m not sure if this is because it’s meant to be dry so that the cake can withstand soaking of the espresso syrup or what?


Curdled batter


Cupcakes ready for the oven

The espresso extract and syrup was very easy to make. I didn't have trouble finding the instant espresso as I have a specialty Italian market just blocks from my house. Gotta love that!

Instant Espresso

The mascarpone cream part was pretty easy, however I wouldn’t recommend mixing with a whisk because the mixture doesn’t come out smooth enough (just my opinion).

I hollowed out each cupcake using the cone method. For the cone method you cut around in the cupcake top about the size of a quarter with a small serrated knife into a circle. You should pull out the part of the cake and it will look like a cone.

Mascarpone cream

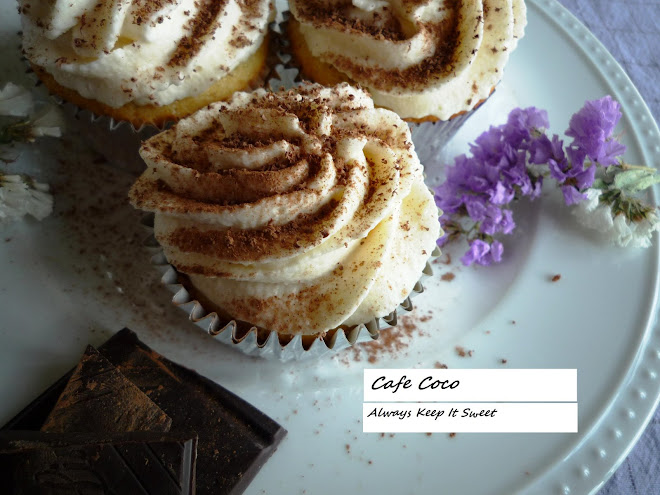
Then you fill the inside with your filling. In this case, I drizzled the espresso syrup in each hole, then piped in the mascarpone cream, then topped with chocolate shavings. I then put the cake top back on, and piped on more mascarpone cream, dusted with cocoa powder and chocolate shavings.
Cone Method


Espresso syrup in cupcakes


Filling in the cupcake

Overall, the cupcakes were not bad, but still not my favorite. I need more of a sugar buzz in my dessert. My husband took them to work and they were gone before he could set the container down. Not a bad sign!

Thank you Megan for hosting!


Next TWD: The Tartest Lemon Tart!

Friday, May 1, 2009

Lemon and White Chocolate Mousse with Strawberries

I was totally awestruck by my Bon Appetit magazine in April. I vowed I was going to make each and every dessert they had…I know I set some pretty intense goals for myself.

The overall appearance of this dessert is mighty impressive, but don’t be fooled because it’s a total cinch to put together. Mousse can sometimes be a daunting task, but either I am really improving or this was super easy. I put it together on a weeknight in about 30 minutes! My favorite part? Piping it into glasses. Oh, how I love piping!

If you don’t like white chocolate, I don’t see why you couldn’t use dark chocolate in its place. It would taste like a chocolate limoncello! My husband on the other hand isn’t into ‘lemon’ or citrus desserts, so I was left eating most of this myself and then pawned the rest off on my neighbors.


Here is the recipe from Bon Appetit if you are interested! ***My only change was to use a glass bowl instead of a metal bowl to cook the lemon juice with the egg yolk for the custard because mine got a real tinny flavor the last time.


White chocolate melting with the cream


White chocolate melted and mixed in with whipped cream


The lemon custard should be about this thick


Mix in the whipped cream


Lemon Mousse, complete!

Enjoy this lovely springtime dessert!

Shrimp and Hominy Soup

I’m back from my long hiatus! I spent the early part of this week visiting my sister and loving her 3 little kids. I love being an aunt ;).

On another note, it’s finally beginning to look like spring where I live and all I can think about is making something that screams fresh.

I’ve been living the life of comfort food for all of the 6 winter months (Winter is supposed to be 3 months, isn’t it? Michigan apparently didn’t get the memo.) It’s finally time for light meals and leisurely nights on my patio with a glass of Oberon or pinot noir in hand. What could be more fun than that?

This soup is light and so fresh tasting that my mom labeled it “The best soup she has ever eaten”. I can’t take all the credit though, my neighbor ‘A’ brought her leftovers for this soup over a few months ago and when I finally twisted her arm for the recipe—there is no stopping me now. I made a few changes; you can certainly do the same for your tastes.

This would also be a perfect match for your “Cinco de Mayo” party!!


Shrimp and Hominy Soup
Recipe derived from Bon Appetit November 2000
Ingredients:
2 tablespoons olive oil
1 finely chopped carrot
2 finely chopped celery stalks
3 garlic cloves, minced
1/4 teaspoon dried oregano
4 cups chicken stock
1 15-ounce can golden hominy, drained
1 can crushed tomatoes with juices
1 teaspoon chopped canned chipotle chilies, seeds removed
½ pound uncooked small shrimp, peeled, deveined
1/2 cup chopped fresh cilantro
Lime wedges
Avocado
Greek Yogurt

Directions:
In a large soup pot or large cast iron pot, heat olive oil over medium heat. Add carrot, celery, and dried oregano and sauté for about 10 minutes. Add the garlic and cook for an additional minute. Add broth, hominy, tomatoes and chipotle chilies. Bring to a light simmer, reduce heat to low and cover and simmer for 30 minutes. Add shrimp and cook until pink on the outside and opaque in the center, about 3 minutes. Add fresh cilantro. Serve with lime wedges, slices of avocado and low fat Greek yogurt.